 Library
Backdating Sales
Under normal operation the POS completes sales with the current date/time automatically. Sometimes though you may wish to enter sales and set the date/time manually.
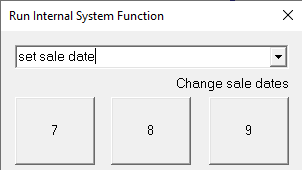
Step 1. Enter the quickcode
set sale dateor
backdate sale, they are both identical

The POS will prompt for the date/time to record this sale at. The main sale screen will also turn to a blue/white pattern while this sale is active to let you know that the sale is abnormal in some way.

Complete the sale as normal. Payments will still be reported using the current date/time, only the reporting dates are changed.
Notes
If you do not get prompted for the date and the quickcode appears to do nothing, check
- That you have started a sale - this command does nothing unless a sale is active
- Verify the current logged in user has the security permission "Sale Power User". This is required to use this command
The date range is limited to the range "90 days before now" and "45 days into the future". If you wish to enter dates outside this range have your administrator change the following settings
- SaleExceptionMinDate (default value is 90) to set the number of days backwards that are acceptable
- SaleExceptionMaxDate (default value is 45) to set the number of days forwards that are acceptable